fbpx

Butternut Squash Soup

Butternut Squash Soup

This is the perfect thick, creamy and rich soup that is packing a huge flavor punch. It is so simple that I created it when I was looking at a can of coconut cream and a fresh butternut squash, thinking to myself what can I do. Being able to create something from nothing is a super important quality to have. Its like the saying, “when life brings you lemons- make lemonade!” Only this time, when life gives you a handful of ingredients, create something delicious! With this simple and tasty way to use squash, it will be an a huge hit for your family or friends.

Butternut Squash Soup

Yields 4 servings

Ingredients 

1 butternut squash 

3 1/2 cups vegetable broth

1 Tbsp. avocado oil

1/4 cup onion

1/4 cup shallots

1 garlic clove

1 Tbsp. Earth’s Balance Vegan Buttery Sticks

1 tsp. Vitacost Himalayan Fine Pink Salt 

1 tsp. Vitacost organic brown sugar

1/8 tsp. nutmeg

Pinch of Spicely Organic Ground Black Pepper

1-2 Tbsp. Thai Coconut Cream, optional topping

1 Tbsp. fresh parsley, topping

Directions

  1. Preheat the oven to 425 degrees F. 
  2. On a baking sheet, place the two butternut squash halves you cut length-wise, flesh side up, and drizzle with olive oil. Sprinkle with salt and pepper and turn over so the skin is now facing up. Roast for 40-45 minutes until squash is tender. Set aside to cool.
  3. Once squash has cooled (around 8-10 minutes), remove the squash flesh from the peel and discard or compost the remains. 
  4. In a skillet, turn to medium heat and add olive oil, onions, and shallots- sauté for 2-3 minutes. Add the garlic and cook for another 2 minutes.
  5. In a medium sized pot, on medium heat add the butternut squash, brown sugar, vegetable broth, onions and shallots, garlic, salt, pepper, and nutmeg.
  6. Using a hand held emersion blender, purée all ingredients until smooth. Then pour in the coconut cream and stir until combined. Cook for 5-10 minutes to allow flavors to meld on medium-low heat. Be sure to stir frequently so it does not burn.
  7. Serve with parsley and coconut cream drizzled on top or freeze for up to 1 month.

Chef’s tip: To make soup more creamy, use 1-2 Tbsp. coconut cream more and blend.

Homemade Apple Crisp

Apple Crisp

Apple Crisp

Thinking back to this simple yet delicious dessert brings back memories of apple picking at Patterson’s Fruit Farms in Chesterland, Ohio. The warm apples mixed with cinnamon and a hint of nutmeg always pairs perfectly with a heaping scoop of cold vanilla ice cream. Pro Tip: For a crisp crunchy top, be sure to clump your oat mixture up in your hands before placing it on the apples. So get out to your local farm and pick up a bag of fresh apples so you can whip up this apple crisp!

Apple Crisp

Yields 10-12 servings

Ingredients

8-9 apples, peeled and cored

1 Tbsp. lemon juice

1/2 cup sugar

2 Tbsp. King Arthur organic flour

1/8 tsp. nutmeg

Topping:

1 1/4 cup King Arthur organic flour

1/2 cups whole rolled oats

3/4 cup butter, melted (about 10 Tbsp.)

1/2 cup brown sugar

1/2 tsp. Vitacost organic ground cinnamon

1/4 tsp. Vitacost Himalayan Pink Salt

1/2 cup walnuts, chopped

Directions

  1. Preheat oven to 350 degrees F.
  2. To prepare your apples, first peel, decore, and slice all apples into wedges- slice again to make wedges more thin. Add the lemon juice and using your fingers, mix apples to coat evenly. Next, add the sugar and nutmeg. Set aside.
  3. In a glass mixing bowl, combine oat flour, brown sugar, cinnamon, butter, salt, and walnuts. Mix until topping mixture has formed.
  4. In a casserole dish, pour apple and evenly place the topping mixture over the apples.
  5. Bake for 45 minutes or until bubbly and top is brown.
  6. Serve immediately with a side of ice cream or a whipped cream topping if you choose.

Chef’s tip: You can add 1/2 tsp. vanilla to the apples if you’d like before baking for added flavor.

Cauliflower Pizza with “Tomato” Sauce

Cauliflower Pizza

Sometimes it can be difficult to find foods that fit our dietary and nutritional needs which is why I have created this gluten and acidic free pizza. Inspired recently by a fellow follower, who is unable to eat tomatoes and has certain dietary restrictions, I came up with this well suitable option. The next family dinner night you have, I invite you to try making this healthy alternative that will leave your belly full. Adding any toppings of your choice is always alright so feel free to get creative!Cauliflower Pizza

Yields 1 large pizza

Ingredients 

1 head cauliflower (about 4 to 5 cups), riced

2 Tbsp. Bobs Red Mill Egg Replacer + 4 Tbsp. filtered water

1/4 cup vegan Parmesan, (optional)

1-2 cloves garlic, minced

1 tsp. oregano

1/2 tsp. fresh basil, minced (optional)

1/4 tsp. Vitacost Himalayan Fine Pink Salt

1/8 tsp. Spicely Organics Ground Black Pepper

1 tsp. Vitacost olive oil

Directions 

  1. Preheat oven to 400 degrees F. 
  2. Using a box grater, grate your cauliflower to make the rice and set it aside. 
  3. In a medium pot, bring 2 cups of water to a boil and pour in cauliflower rice. Allow to cook for 5-6 minutes or until tender. Drain using a fine mesh strainer or cheese cloth. Squeeze any remaining liquid out- very important step. 
  4. In a small bowl, combine your egg replacer and water. Set aside
  5. In a large bowl, combine cauliflower rice, egg replacer, oregano, salt, pepper, basil, garlic, flour, and vegan Parmesan. Mix until dough l-like consistency forms. 
  6. On a lined baking sheet with parchment paper, sprinkle with flour or corn meal to help keep it from sticking. Spread out the dough 1/2 in thick so it has a nice crust to it. 
  7. Bake for 20-25 minutes.
  8. Remove from the oven and add your sauce of choice, vegetables, protein, cheese, or any topping you’d like. Return to the oven for an additional 7-8 minutes just to brown the toppings or cheese. 
  9. Slice and enjoy with parsley or red pepper flakes on top. 

Chef’s tip: Make sure to lightly spray or oil the parchment paper so it does not stick to the crust. Also, I pre roasted a few slices of sliced onion, mushroom, and bell peppers to place on top of the pizza before baking it again.

No-Bake Pumpkin Cheesecake Bars

Pumpkin Cheesecake Bar

Pumpkin Cheesecake Bar

Pumpkin pie is a notorious fall-inspired dish that makes its way on to the dinner table during numerous holiday parties throughout the autumn season. Normally comprising of eggs, dairy, and heavy cream- this recipe leaves those out! This raw vegan dessert uses a cashew “cream cheese” as it’s base, only to be accented with flavorful aromatics such as lemon juice, maple syrup, and pumpkin spice seasoning. Instead of using your oven for this dessert, you’ll only need a mixer and food processor. Can’t wait for you to sink your mouth into this wholesome plant-based and non-baked pumpkin cheesecake!

Pumpkin Cheesecake Bar Crust

Yields 15 servings

Ingredients

Filling:

1/2 cup Vitacost pure maple syrup

2 tsp. pumpkin spice seasoning

2 8 oz. containers of Miyoko’s “Cream Cheese”

1 tsp. vanilla extract

1 1/2-2 cups pumpkin purée, homemade

1 tsp. lemon juice, freshly squeezed

Crust:

2 cups raw almonds, unsalted

8 mejdool dates, pitted

1 Tbsp. pure maple syrup

4 Tbsp. vegan butter or coconut oil

1/3 cup gluten-free rolled oats

1/2 tsp. pumpkin spice seasoning

1/4 tsp. cinnamon  

Whipped “Cream”:

1 13.5 oz. can coconut milk, full fat

1/4 tsp. powdered sugar 

1/4 tsp. vanilla extract

Pumpkin Cheesecake Bar

Directions

  1. To make your crust using a food processor, combine the graham cracker crumbs, coconut oil, and mejdool dates. Pulse until mixture is well combined and is crumbly-looking.
  2. Press crust mixture into a 11”x7” cake pan that has been lined with parchment paper. Set aside.
  3. In a Kitchen-aid stand mixer, pour “cream cheese”, maple syrup, vanilla extract, pumpkin purée, pumpkin spice, and lemon juice and mix until well combined.
  4. Pour mixture into the prepared pie crust and place into the freezer for at least 2 hours to set (overnight-48 hours preferred).
  5. In your stand mixer, combine coconut cream, vanilla, and powdered sugar and whisk for 2-3 minutes until very smooth, be careful not to over mix. 
  6. Once bars have set, allow to defrost for 20 minutes before slicing into equal squares and top with whipped cream and a pecan.


Chef’s tip: Feel free to make the crust out of walnuts and almonds or use a mixture of graham cracker crumbs with walnuts or almonds.

Hot Apple Cider

Apple Cider

Each year, I have really enjoyed making my own apple cider with fresh organic apples. There is always the added benefit when you are able to make something from scratch. Controlling the sugar level and what ingredients you are using are key elements in reducing a lot of unwanted processed additives. This recipe will be a fan favorite during the fall and winter months.

Apple Cider

Yields 4-5 servings

Ingredients

13 apples

3-4 cinnamon sticks

4 Tbsp. All Spice kernels

3/4 cup sugar


Directions

  1. To prepare apples, decor and cut into slices.
  2. Place into a large stock pot and cover with water. Add sachet of cinnamon and all spice. Place on high heat and bring to a rolling boil for an hour-uncovered. Reduce to low heat and simmer for 2 hours covered.
  3. Remove from stove and pour mixture into blender or use a potato masher. After you blend for a minute or mash it, use a fine mesh strainer to remove all of the pulp.
  4. Serve with vegan whipped cream on top and cinnamon.


Chef’s tip: For a smoother cider, you can use a cheese cloth to strain to remove any further pulp or spices.


Sweet Potato Smoothie 

Sweet Potato Smoothie

Sweet Potato Smoothie

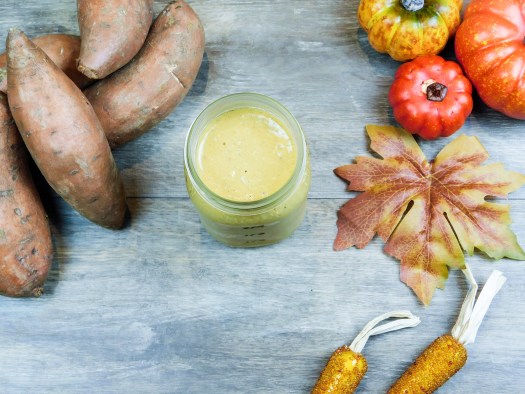
Being creative with your smoothie making can be hard, so I have created this fall-inspired sweet potato drink. With only using organic and wholesome ingredients, this nutrient packed fall smoothie will be your new favorite morning snack.

Sweet Potato Smoothie

Yileds 1 serving

Ingredients

1 sweet potato, roasted

2 cup plain almond milk

1/4 cup rolled oats

1 tsp. pumpkin spice seasoning

1/2 tsp. cinnamon

1 tsp. camucamu powder

pinch of Vitacost Himalayan Fine Pink Salt

Directions

  1. In a Vitamix blender, place all above ingredients in and turn to highest setting. Blend for 2-3 minutes or until smooth. 

Authentic Columbian Arepas

Vegan Arepas

Vegan Arepas

It’s our favorite day of the week, Taco Tuesday! Change it up this week with these soft and fluffy Arepa’s. With only using 4 ingredients, this recipe is a great and easy weekday meal. After pan frying (or baking) these South American treats to perfection, you will want to try filling your Arepa’s with a variety of food! One of my favorite fillings is fresh jackfruit from Bedner’s Farm. It is a great “texture” if you are looking for an arepa with shredded “meat,” add beans, guacamole, tomato and enjoy! Don’t forget to try this with my Ancho Chili Sauce – it’s the perfect finishing touch for Taco Tuesday!

Vegan Arepas

Yields 10 arepas

Ingredients

2 cups P.A.N Harina Blanca – Pre-cooked White Corn Meal

4 Tbsp. Earth Balance Vegan Buttery Sticks

2 1/4 cups of hot water

1 tsp. Vitacost Himalayan Pink Salt, for flavor

Directions

  1. In a large mixing bowl, combine corn meal, melted butter, and salt. Slowly add the hot water in increments and mix until a dough-like consistency has formed.
    • Note** Do not allow dough to get gooey, it should be slightly wet.
  2. Next, grab a handful of the dough (roughly 1/4 cup) and roll it in to a round sphere. Flatten dough in to a disk shape using the palm of your hand.
  3. Drizzle oil into frying pan and turn on medium-high heat. Cook arepas for 2-3 minutes on each side or until slightly golden brown.
  4. Allow to cool and slice in half. Add desired fillings and enjoy.

Chef’s tip: For added flavor, you may choose to add some extra seasonings: cumin, oregano, red pepper flakes, or adobe all purpose seasoning.

Peanut Butter Cup Nice Cream Bowl

Peanut Butter Cup Nicecream Bowl

Peanut Butter Cup Nicecream Bowl

I don’t know about you all, but there is something about peanut butter, chocolate, and bananas that resonates deep within! Morning’s can sometimes be dull or basic since we are usually rushing out of the door to conquer our daily duties. Thus leaving little to no time for us to focus on our most important meal of the day, breakfast. This is a great start to any day or even a great post-workout snack! In whatever you decide, you can always personalize this bowl and add any fruits, seeds, or powders of your choice.

Peanut Butter Cup Nicecream Bowl

Yields 1 smoothie bowl

Ingredients

3-4 frozen banana’s

1 tsp. moringa powder.

3 Tbsp. Vitacost Certified Organic Crunchy & Unsalted Peanut Butter – Gluten Free and Non-GMO

1 Tbsp. Hershey’s Natural Unsweetened Cocoa

1 medjool date, pitted (optional)

Toppings:

3 Tbsp. hazelnuts

1 Tbsp. agave nectar

1/2 sliced banana

2 Tbsp. carob chips

1 Tbsp. chia seeds


Directions

  1. Blend all ingredients using tamper to help mixture along until smooth.
  2. Pour into a bowl and add toppings.

Roasted Fall-Inspired Stuffed Acorn Squash

Stuffed Acorn Squash

One of the best things about the Autumn season besides the foliage and pumpkin spice is all the meals you can enjoy with winter squash! Many people find cooking squash to be intimidating, however, this recipe couldn’t be simpler! Prepping and cooking your squash will take some time and patience, but once it is done roasting, you will be delighted with the outcome. This fall festive meal will bring your tastebuds on a journey that you won’t forget!

Stuffed Acorn Squash

Yields 2 servings

Ingredients

2 medium acorn squash, cut in half and seeds removed

1 cup Vitacost quinoa, dry

2 cups filtered water

1 small yellow onion

2 Tbsp. Vitacost maple syrup

2 Tbsp. apple cider vinegar

2 Tbsp. avocado oil

1/2 tsp. curry powder

1/2 tsp. ground cinnamon

1/4 tsp. smoked paprika

1/2 cup dried cranberries

1/2 cup whole walnuts, coarsely chopped

1/2 cup parsley, chopped

Pinch of nutmeg

Pinch of Vitacost Himalayan Fine Pink Salt

Pinch of Spicely Organics ground black pepper

Directions

  1. Preheat oven to 400 degrees F.
  2. Prepare squash by cutting in half and removing seeds. Place the squash on a baking sheet (cut side up).
  3. In a small mixing bowl, combine maple syrup, vinegar, and 1 Tbsp. oil. Brush all over the squash’s flesh and put into the oven.
  4. Roast squash for 55-60 minutes- basting every 20 minutes. Set aside the maple syrup and vinegar mixture.
  5. In a sauce pan, heat the remaining oil and add the diced onions. Sauté until slightly golden brown. Next, add your quinoa and stir around for 2-3 minutes. Mix in your cinnamon, nutmeg, salt/pepper, curry, smoked paprika, and water. Cover with lid and simmer for 18-20 minutes.
  6. Allow to sit for 5 minutes. Open lid and add cranberries, half of the walnuts, remaining maple syrup and vinegar mixture, and parsley (save other half for topping).
  7. Stuff the squash with the quinoa mixture and top with remaining parsley and cranberries.

Chef’s tip: For the quinoa mixture, you can always add more cinnamon, maple syrup or nutmeg according to your taste.

Parmesan Chickpea Cutlets

Photo Cred: Ivy Becker

I’m a sucker for authentic Italian food. Pretty much any combo of sauce, cheese and some sort of breading used to be my go-to. Going vegan certainly doesn’t change this. All it takes are a few alternate ingredients to duplicate any classic Italian dish. I created the following recipe to vegan-ize my favorite one of all! These chickpea cutlets come together super quickly and taste great when smothered in homemade tomato sauce with cashew “Parmesan” (or your preferred dairy-free cheese!). Be sure to pile your serving platter high because your family will devour this delicious, cruelty-free take on typical Parm.

Yields 4 cutlets

Ingredients

1 cups Vitacost Garbanzo Beans, soaked and drained

1 cup Lundberg Organic California White Basmati Rice

1 Tbsp. Bob’s Red Mill Egg Replacer Gluten Free + 2 Tbsp. Water, mixed together

1 Tbsp. fresh parsley + extra for garnish

1 small clove garlic

1/4 tsp. Simply Organic Thyme

1 tsp. Simply Organic Oregano

1 tsp. Frontier Co-Op organic Poultry Seasoning

1/4 cup Edward & Sons organic Panko Breadcrumbs

1 cup plain almond milk

1 cup King Arthur Flour Organic Unbleached All Purpose Flour

2 cups tomato sauce

2 cups vegan Parmesan cheese

1 tsp. Vitacost Himalayan Fine Pink Salt

1/2 tsp. Spicely Organics ground black pepper

Photo Cred: Ivy Becker

Directions

  1. Preheat oven to 375 degrees F.
  2. In food processor, pulse chickpeas, white rice and egg mixture until well combined.
  3. Mix in poultry seasoning, parsley, thyme, oregano, salt and pepper.
  4. Form dough-like mixture into flattened patty-shape discs.
  5. Bread chickpea cutlet first by dipping into almond milk, then into the flour, then back into the almond milk, and finally into the bread crumbs.
  6. Place breaded cutlets onto lightly greased baking sheet. Bake for 20 minutes or until golden brown.

Chef’s tip: For easier breading, place formed cutlets into the freezer to harden.